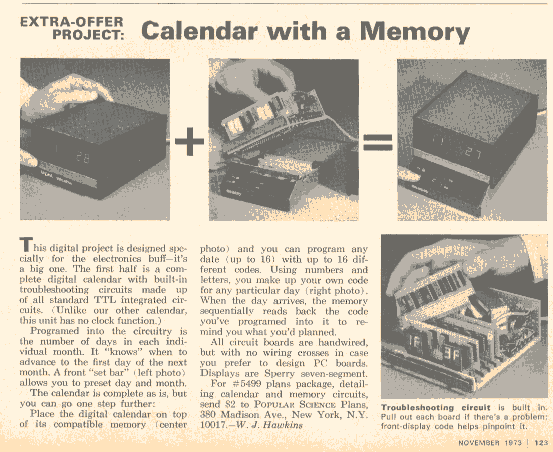
One chip with 8000 transistors simplifies this DIGITAL CLOCK/CALENDAR
Most of your work's already done when you wire a new chip into this circuit
By William J. Hawkins
PS Electronics Editor
 What's beautiful to look at, is always on time, and will never
refuse giving you a date? Our digital clock/calendar, of course.
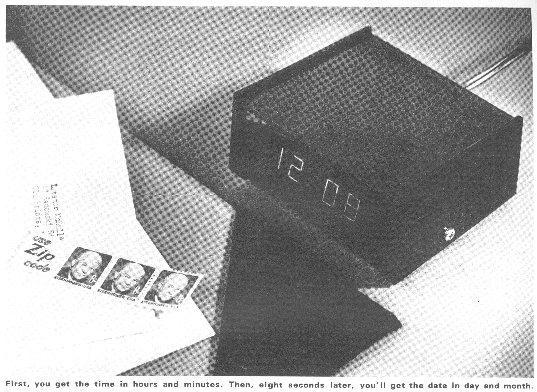
For eight seconds it flashes the time in hours and minutes on
large, easy-to-read seven-segment displays. Then, the numbers
change - it's the date, in month and day numerals. Two seconds
later, the clock reverts to a readout of the time. In this
scanning mode, the clock/calendar continues giving you the time
and date every 10 seconds.
Want just a clock? Or, just a calendar? Simple. Flip the rear programming switch to either selection and display the date or time continuously. As the minutes pass, the clock updates, and when it reaches midnight, the calendar advances a day. It's a totally automatic timepiece, but that's not all:
Too bright for a bedroom clock? Never. The digital clock/calendar automatically measures the amount of light present in a room and adjusts the displays accordingly. A bright room causes the displays to become brighter. Darken the room lights, however, and the displays dim down in intensity, always pleasing to the eye but fully legible.
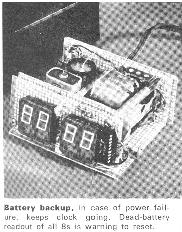 A power failure throws most digital clocks into a frenzy, but not this
one. If the power should fail - even for a split second - the clock/calendar
switches over to an internal battery and auxiliary oscillator circuit
that keeps the time and date always correct.
And, in extreme cases - where power has been off for many hours and the battery has given up - this clock lets you know the moment power is restored. The readouts glow bright 8s, signifying that the time and date must be reset.
Chip wit. All the "thinking" for the clock/calendar is done in just one LSI (large-scale integration) circuit, commonly called a "chip." It's new from Mostek.
The Mostek chip takes the 60 cycles from your line voltage and precisely divides it into seconds, minutes, hours, and finally, days. (Seconds are not displayed in our design.) Then, more built-in logic circuits scan both the time and date storage areas of the chip and send the result through an output logic circuit called a multiplexer. The multiplexer sequentially scans all the sections of the readout tubes, lighting just the necessary ones to form the correct number. The scan is very fast, so, even though each segment of each display is lighted individually, it appears to the eye that all are lighted at once.
The input information the chip, such as time set and calendar set, is also multiplexed. Lines running to these switches are scanned and voltages on certain lines at certain times represent to the chip that you've pushed a button. (Diodes on these lines are used for isolation.)
The Dionics IC (IC2) and the eight transistors in the circuit are simply drivers for the Sperry displays, which require an operating voltage too high for the clock/calendar chip to handle.
The Sperry displays were chosen because of their appearance. The numbers are just 1/2" high, but due to the way they're shaped, they appear to be about twice that. And the orange glow of the lighted segments overlap slightly, so a number appears whole rather than split up into segments.
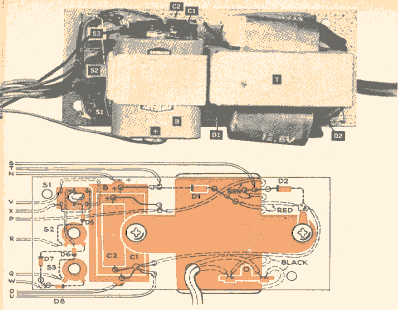
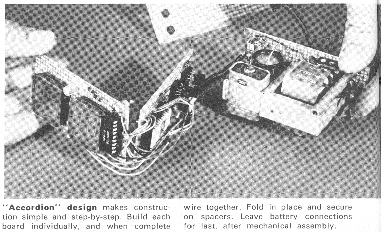 Building pointers. You can build the entire clock/calendar
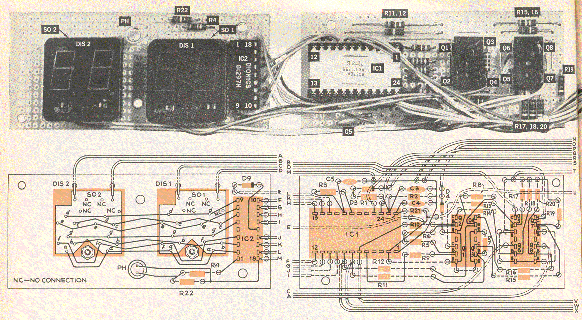
on three perforated circuit boards with hole spacings to match
a standard IC. Use the drawings and photos for exact measurement
and component spacing. They are actual size. Interconnections on
each board are made with #22 bus wire, and connections between
boards use #24 stranded wire.
Two 14-pin IC sockets are used for the eight transistors. Regular transistor sockets are a bit large, and wiring the components directly into the circuit isn't recommended.
The Mostek chip uses a standard 24-pin IC, while the Dionics package requires an 18-pin socket - not so standard. To get around this, cut down a 14-pin socket to only 4 pins and butt it up against a second 14-pin socket.
Sockets are also used for the Sperry displays. The pins in these sockets are quite delicate, so use as little heat as possible while soldering and do not pinch or squeeze them while you are intent on installing the wire.
The battery holder is simply held in place against the transformer with a dab of metal adhesive glue. This particular battery will last only a few hours during a power failure. If you feel this isn't a long enough period, you can add a connector at the rear of the clock for a larger external battery. Be sure, however, that it's 15 volts.
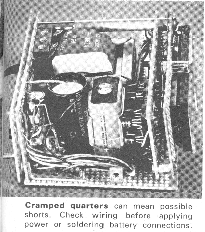 Two 1/4" spacers separate the front display board from the logic
control board. Once you've mounted them together, be sure to check
carefully for shorts between the backwiring of each board. You'll
find 1/4" plenty of room - if you've kept the rear wiring flat and
against the boards as you build.
Add approximately 1" of slack in the interconnections between the two front boards and approximately 4" of slack between the middle board and the power supply board, to allow folding the boards in an "accordion" shape. The 2-3/8" spacer (we used one 3/4" and one 1-5/8" spacer) between the power-supply board and the center logic board will hold the assembly together. A piece of perf board will serve for the bottom, and L brackets will hold it to the circuit boards. Another piece of perf board is used to enclose the back.
The top of the clock/calendar is made from Plexiglas. You can use our design or devise one of your own. The box should be mounted with L brackets to the base and offset 1/4" to the right (facing the displays) to allow for sufficient clearance of the interconnecting wiring.
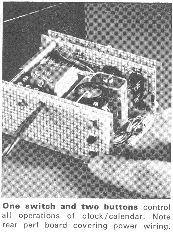 Power on. Operating the digital clock/calendar is simple.
The three-position toggle switch (S1) selects either display time,
display calendar, or sequence (center position). To set the time,
S1 must be in the display-time position. The two pushbuttons,
S2 and S3, are then used to increment the display. Pushing S2
advances the hours, while pressing S1 advances the minutes. To
advanced the tens of minutes, simply push them both at the same time.
With S1 in the display-calendar position mode, S2 and S3 then increment date. S2 will advance the months digit, and S3 will increment the days. Each time you change the date, however, the clock portion of the circuit automatically changes to the a.m. portion of the day. So, if you change the date during the hours after 12 noon, you'll have to advance the time display another 12 hours. This will make the calendar update properly, at 12 midnight, rather than 12 hours early.
Once you've set it, forget it. The only updating you'll have to do is at the end of some months. The calendar runs for 31 days and resets to 1. If a month has less than 31, therefore, you'll have to reset to the proper day at the end of the month.
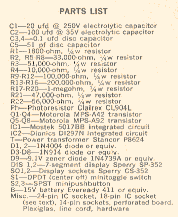
Something for free. Cost for the digital clock/calendar components will be in the area of $60 to $70. If you're an old electronics buff and know the right sources, you probably won't have much trouble in obtaining the components. But, if you run into difficulty (as most of us do), send a stamped, self-addressed envelope to Popular Science, Clock/Calendar, 380 Madison Ave., New York, N.Y. 10017, and we'll send you a free listing of where you can get each component for the clock/calendar.
