DIGITAL CLOCK KIT ROUNDUP
Part I. A comparison between the various digital clock kits that are currently available
Fred Blechman
|
| |
|
|
"TIME FLIES" ... "TIME IS MONEY" ... "A STITCH IN TIME SAVES nine" ... "TIME heals all wounds" ... "TIME is of the essence." These and countless other familiar phrases abound, since TIME, reputed to be the fourth dimension, is so important in all our lives. The latest evidence of the consuming interest in TIME is the proliferation of watches and clocks with digital readouts. Who hasn't seen the familiar "countdown" numerals displayed on TV during space launches?
Early-generation digital timepieces contained ingenious mechanical or electro-mechanical movements. These were followed by electronic "modules," solid-state crystal-controlled microcircuits - very expensive, but highly accurate and reliable. With broad acceptance, technological advances and the resultant economies of high production, electronic module price structures have collapsed encouraging even higher sales, more production, and still lower prices. This is most noticeable in the digital wristwatch field. Today you can buy a five-function (hour, minute, second, day and date) digital wristwatch for $39.95, with good likelihood of some models at years-end selling for $19.95. A digital readout watch of the same kind cost over $200 just two years ago!
The digital clock field has been much less dynamic. Electro-mechanical movements abound, stimulated by the clock-radio and bedside alarm market. Size and life requirements are much less demanding than in wristwatches, allowing the use of cheap mechanical contraptions from "flip-cards" to light-shutter devices. Only recently, with the availability of sophisticated, specially-designed IC's, are electronic digital clocks making an impact in the consumer marketplace. With 1/60th-second accuracy, 6-digit readouts in various colors and sizes, alarm accuracies to the minute and no moving parts, electronic digital clocks are beginning to challenge the "old-timers." With technology advancing by leaps and bounds, formerly hard-to-get parts are becoming readily available at realistic prices, as a survey of the advertisers at the back of this magazine will confirm.
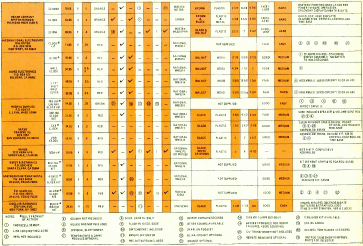
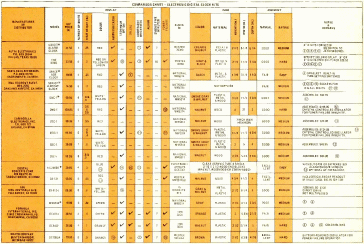
Therefore, it's not surprising that many suppliers and manufacturers are jumping on the electronic clock-kit bandwagon. One supplier reported that they fill orders for 50 clock kits a day, at $19.95 each, and another claimed they had sold 25,000 clock kits at $9.95 before discontinuing that design! Until about a year ago, it was hard to find a digital clock kit for under $50, and they were relatively complex units. Today, as a glance at the accompanying comparison chart will show, you can get kits for under $12, and - perhaps the best news of all - several of them are really easy to build!
Click for a full-size image. |
Click for a full-size image. |
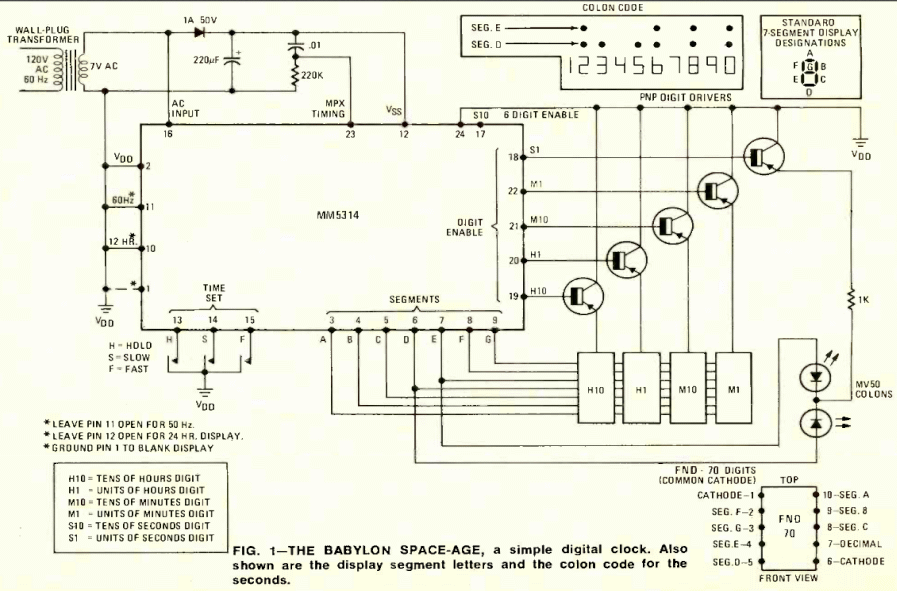
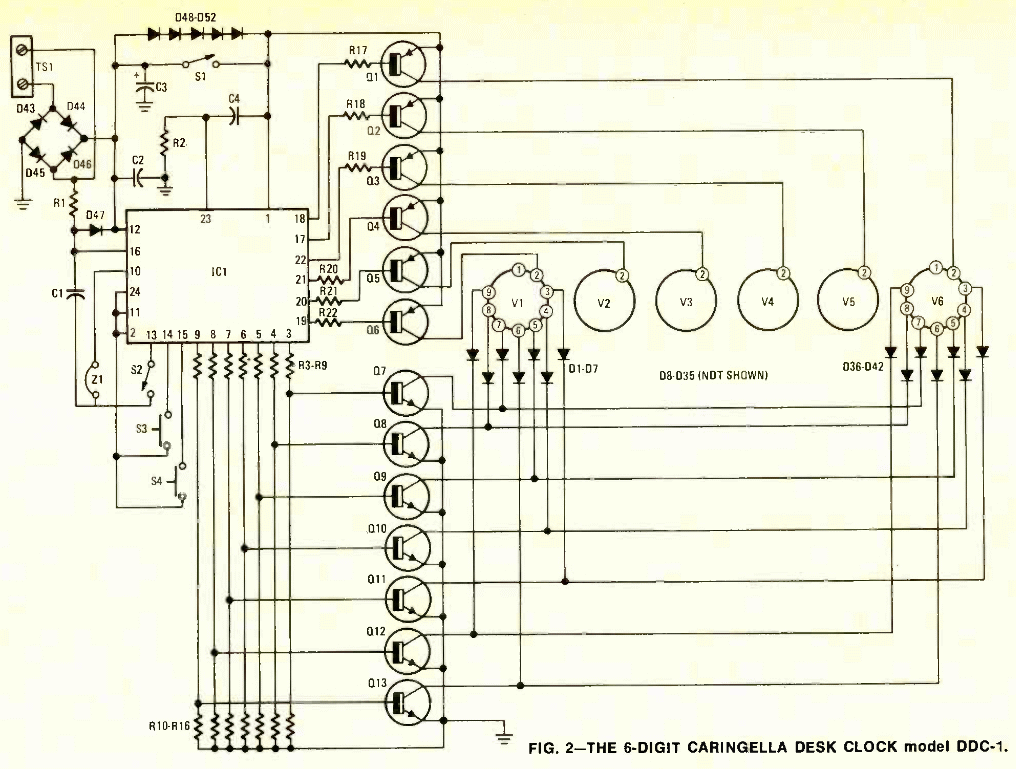
Many of the terms used in the digital clock field are peculiar in their application to this area, so explanations follow. By referring to these explanations, the comparison chart will be found to contain a great deal of valuable information if you are considering buying a kit, or if you just want to be more familiar with this "branch" of electronics. To help, Fig. 1 is a schematic of the simplest of the units reported on, the Space Age Clock from Babylon Electronics, yet it contains all the essential elements of a basic electronic digital clock. Figure 2 shows another schematic. This one is for the Caringella model DDC-1 desk clock.
Display
This is what you see, the
"readout." Most of the kits feature 6 digits, with two for hours, 2 for
minutes, and two for seconds. Those with four digits normally display only
hours and minutes, and are not very exciting to watch. Some four-digit
clocks shift to unit-minutes and second display with a switch. Colors
and size cover a broad range. Several years ago, only very large (0.6
inches high) or very small (0.125 inches high) characters were available
in kits. Now the smallest digits any respectable kit supplier offers are
0.25 inches high - easily readable from 15 feet with normal eyesight. The
largest digits in any of the kits shown are 3 1/2-inches high, and you
can read them from at least 200 feet away.
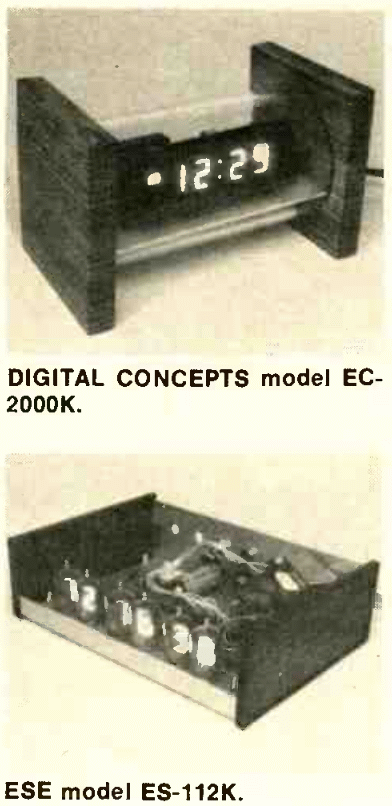
The most common displays are red, but the ones listed as white-yellow in the chart can be made to appear almost any color by placing colored plastic or glass in front of them. You can even make each digit a different color if you want a really unique display! One manufacturer, Digital Concepts, will color your display to order, with their standard display an outstanding bright blue (model EC-2000). Some displays are fluorescent vacuum tubes, some light-emitting diodes (LED's), some gas-discharge types, and some are incandescent. All the units reported on use seven segments to form the numbers, as shown in Fig. 1. Before long you can expect units with alphanumeric readouts to show the day of the week on calendar clocks.
AM/PM indicators are provided within some displays as actual letters, but a less expensive, and hence more popular method of designating AM or PM is to use a decimal point or separate LED. In some kits, the first digit is mounted inverted so that the decimal point appears at the upper left corner of the display. This AM /PM designator allows 12-hour format alarm clocks to be set for repeating in 24 hours. For the non-alarm clocks, the AM /PM indicator is hardly a necessity, except for submarines, caves or dungeons! Many of the kits can be wired for either a 12- or a 24-hour display. The 24-hour format is popularly known as "military time," but is used worldwide in time measurement. Midnight is 00:00:00, noon is 12:00:00, 1 PM is 13:00:00, 6 PM is 18:00:00 and one second before midnight is 23:59:59. AM /PM indicators are not needed with 24-hour displays, since any number under 12:00:00 is AM, and any number larger is PM.
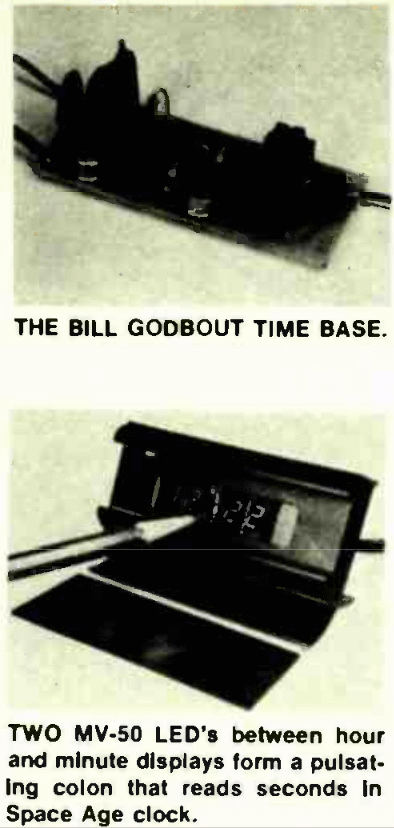
Surprisingly, many of the clocks omit colons (:) between pairs of hours, minutes and seconds digits. Six-digit displays without colons are confusing, especially if there isn't wide spacing between the pairs of digits. Some of the 4-digit clocks have blinking colons that go on and off every second, adding some action to an otherwise lifeless display. The most interesting of these blinking colons is in the Babylon Space Age Clock, where the upper and lower points of the colon are coded to count seconds from 1 to 0 with a change every second. This is done by having the upper colon point driven by the segment E command to the non-displayed sixth digit, and the lower colon point driven by the segment D command to the same digit. Figure 1 shows when each colon is on during the seconds count. The colon display is different every second, and repeats every 10 seconds. This is useful in precise time-setting of the minute digit.
The purpose of adjustable brightness is to dim the display in low ambient light environments, so the display doesn't overpower its surroundings, and to conserve power. This is done in most clocks with a light-sensing photocell, although some use a bright-dim switch. The Digital Concepts EC -2000 was outstanding in its photocell control of brightness, from a pleasant blue glow in darkness to a very bright display in highly-lighted areas.
Alarms
Many of the clock kits available now can be used as bedside
alarms. In addition, the Altaj 4-Digit Clock and the Meshna SP-284 Clock
Kit can be used to control an external radio to turn on or off (sleep
switch). The alarms, instead of a raucous buzzer, are a beeping tone from
a built-in speaker. All the alarm clocks have a "snooze" switch that
shuts the alarm off for a short period of time (7 or 10 minutes). The
big advantage of the alarm on these clocks is that they can be set
to the minute, and most can literally be set to go off at the desired
second (exactly on a minute change). Also, all the alarm clocks have
24-hour repeatability, with the use of the AM/PM indicators for
alarm-time setting. This means you can shut off the alarm when it sounds,
turn it right back on again, and it will repeat 24 hours later! Try
that with a regular alarm clock!
Power failure indicator
With most
regular electric clocks, if the power is interrupted for a short time,
they start automatically when power returns, and are slow by the length
of time the power was off. You could be completely unaware of this time
inaccuracy. Since power outages often occur in the middle of the night,
you could be late for work! Electronic clocks are not that callous! They
will respond, depending on their design, one of three ways to an AC
power loss when the power returns: 1. the clock starts counting at some
random, completely inaccurate time - usually around zero; 2. the display
comes back on after going off, and is right on time (battery-driven
time-base oscillator keeps counting during the outage) or 3. the display
"signals" that the power has been interrupted. This "signal" may be a
non-counting display locked on 12:00:00, or 88:88:88, or a blinking
AM/PM indicator, or blinking colons, or the sounding of the alarm, or
some combination of the above (or none of the above!). The alarm going
off is particularly important for those who depend on the alarm to wake
them and experience a middle-of-the-night power loss.
Clock IC
All but one of the clocks on the Chart use a main clock "chip" that performs
wave-shaping, counting and control functions instead
of having an abundance of individual IC's. The IC only needs DC power
and a source of 60 (or 50) Hz; it counts down to seconds and signals
the proper segments of each digit to display the correct number for
that instant. Also, most of the clock IC's shown "multiplex" the digit
signals; all segment commands are carried on parallel lines to each
digit, and the individual digits are enabled one at a time at a rate
too fast for the eye to follow - this eliminates flicker. The scanning
rate is controlled by a resistor-capacitor circuit to the clock IC,
with typical values yielding a multiplex frequency of 2000 Hz. (See the
0.01 capacitor and 220K resistor in Fig. 11).
Multiplexing reduces the number of leads between a 6-digit display and the clock control from 42 to 13, as well as saving 29 driver-transistors and 35 current -limiting resistors in most applications! Most clock IC's can't handle display current requirements directly, and require driving transistors and current-limiting resistors. However, more "direct drive" clock chips are appearing on the market, eliminating many of the resistors and transistors to drive the displays. Many parts can be eliminated by clever design and component selection. The Babylon Space Age Clock (Fig. 1) and the International Electronics Clock drive the segments of the FND-70 low-current displays directly, and depend on the current-limiting of the MM5314 IC to keep the LED display from "avalanching" and burning out -this eliminates seven transistors and seven resistors! Several clock kits use direct-drive IC's that eliminate almost all the transistors and resistors.
Enclosures
Some of the kits do not include a case, and the
builder is left to his own ingenuity. It can take more time to "package"
the clock than to build it! So, unless you have a custom application,
it's recommended that you buy a kit that includes a case. Some of the
cases are exotic - Digital Concepts offers a variety of wooden decorator
end-blocks for its EC -2000 Clock that is enclosed in a clear plastic
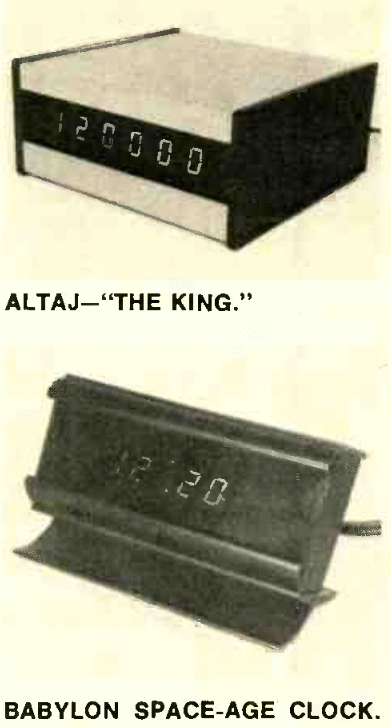
tubular enclosure. The Altaj clocks have sturdy, modern-design metal
and plastic cases, punched to accept switches and mounting hardware for
the electronics. Some have wooden cases, with the most unusual in this
group being the
Caringella LDC-1, a 7-inch high hexagon with one single large digit
displayed! Also unique in appearance is the Babylon Space Age Clock
whose case is a black-anodized 3 1/4-inch length of aluminum extrusion
with a "far-out" cross-section.
Assembly
Some of the assembly and
instruction "manuals" were one sheet of paper with a schematic and a parts
list. Others were elaborate (such as the unexcelled Heathkit manuals),
with many drawings and specific step-by-step instructions. Only the
Heath manuals went to the extent of describing the physical appearance
of each part, so a gross beginner in electronics could identify the
components; others seemed to assume the builder could identify
resistors, capacitors, diodes, etc., and could put the kit together
with minimum instruction. This is unfortunate, since many of the kits
were really simple enough for a beginner to tackle if they only had more
detailed instructions.
Clock kits that should take the average electronic hobbyist less than an hour for electronic assembly (not including case installation and checkout) are rated "Easy"; "Medium" is from 1 to 3 hours, with over 3 hours rated "Hard." Despite the excellent instructions, the Heathkits, with many wires between sub-assemblies, appear to be the toughest to assemble of this group. The easiest of the group to assemble is, without reservation, the EC-2000. It was also the only clock built by the author from a kit that required no trouble-shooting!
Building the kits
Before attempting to build any of these clock kits, be sure
you have the right equipment. You'll need a 25 to 50-watt soldering
iron with a small tip (1 inch diameter), fine longnose pliers,
20-gage stranded, insulated wire, wire cutter and stripper (a finger-nail
clipper works great for small wire), and some small-diameter solder
(if the kit doesn't include it). Digital Concepts include "solder wick"
with their kits; it uses capillary action to soak up solder from unwanted
points - very handy for some of the close work on these clocks. Patience is
required, as well as careful soldering. Most of the problems encountered
by the author in constructing these kits were traced to soldering - either
bad joints, or "bridges" between circuit paths.
A circuit trick you might want to add to most clocks using the MM5314 clock chip is one used in the Formula International MM5314 Clock. It is a characteristic of the display output of this chip that the number "six" is without a top-segment A is not activated. To remedy this, add one IN4001 or similar rectifier-diode from segment D or E to segment A (marked cathode end to A) . This will add the top segment to all the sixes as they appear in the display, since they are multiplexed.
You may encounter some difficulty getting the clock to work properly after it's completed. The display, if it's lighted at all, will give you the best clues. Use a magnifying glass or jeweler's loupe to inspect all suspect (and non-suspect) solder joints - it's amazing how a connection that looks perfect to the naked eye is a mess under 7-power magnification! Also look for solder bridges or "jumpers" across printed circuit paths or display or IC pins. If a common segment is "missing" from all the digits, check back through the segment driver circuitry to the IC. If a single digit doesn't light, check the digit-driver circuit back to the IC. If a particular segment of a single digit is dark, check the connection of that digit pin to the circuit - it could be a dead segment in the digit itself, which means a new digit! If the clock doesn't count, operate the time-setting controls - some clocks won't start until then. Be sure the HOLD switch isn't shorted. Also, be sure the AC is getting to the IC (pin 16 in Fig. 1). If the display doesn't light at all, check the power supply section. A voltage check across the power supply filter (220 μF in Fig. 1) will quickly tell you if you have DC voltage.
For a better understanding of digital clocks and watches, in- cluding details on circuitry, an excellent book is "Electronic Clocks and Watches," by Michael S. Robbins (Howard W. Sams, Cat. No. 21162. $6.50).
Setting your clock
The time on these clocks is
set with pushbutton, slide or toggle switches. Clocks using the MM5314
IC have the simplest time setting: the FAST switch moves the hours ahead
once per second,
the SLOW switch moves the minutes ahead once per second, and the HOLD
switch stops all counting. By simply setting the display time ahead of the
real time, and then putting the count on HOLD until the real time catches
up, you can set your clock to within a fraction of a second of whatever
time standard you're using. Other IC's use various control arrangements
to set time, some advancing tens of minutes, others changing
twice-per-second instead of once, and some use two switches in combination
to provide a third function. Calendar and alarm controls are the most
confusing at first. Three of the 4-digit clocks that normally display
hours and minutes can be switched to show minutes and seconds. Of all
the clocks tested, only the Altaj 4 -Digit Alarm Clock had no means of
synchronizing to the second.
Some sort of time standard is necessary to set these clocks accurately. The phone company offers the most available and least expensive method - look up the number for "time" in your local directory. A short-wave receiver that can tune in WWV or CHU time broadcasts gives more accurate time information. Caringella Electronics offers a specially-designed Standard Time Receiver kit (STR-1 $79.95, assembled $99.95) that receives these broadcasts on three crystal-controlled receiving frequencies.
Going mobile
You may want to
use your digital clock in your car, trailer, camper or dune-buggy. Only
the Heath GC1093 and Nexus clocks
are specially designed for car use, but at least three of the other
kits included in this article could be adapted readily for car use. The
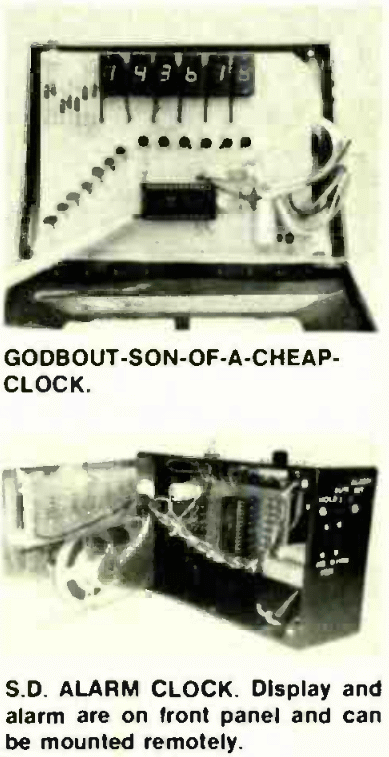
Godbout Son-of-a-Cheap-Clock instructions specifically describe car
operation using their optional Crystal-Controlled Timebase kit ($10.50)
that provides 60 Hz from 12 volts DC. Actually, all the MM5314 kits,
and all the others that don't require boosted display voltages, can
operate from DC supplied by a 12-volt car battery if a timebase is
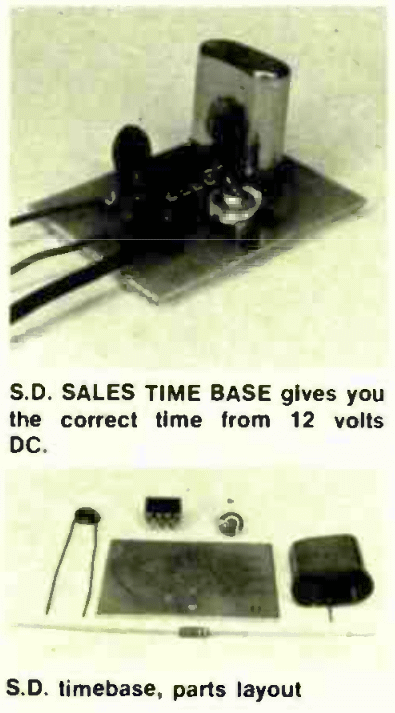
added. S.D. Sales offers a timebase kit for $5.95 that uses a 3.58 MHz
color-TV crystal and a National Semiconductor MM5369 IC to count down
directly to 60 Hz. You might even consider using a timebase in your
AC-powered clock. This eliminates power line "glitches" (transient
peak voltages) that can literally "knock your clock off" in terms of
accuracy. The author has found the MM5314 chip particularly vulnerable
to this problem, sometimes advancing hours or minutes for no apparent
reason when powered by certain wall-sockets or near other electrical
appliances.
Simply power the timebase by connecting it across the clock's power supply filter capacitor, observing polarity, and feed the 60-Hz output of the time base to the 60-Hz input pin of the clock IC (disconnect the existing input). This could increase the accuracy as well, since the power-line frequency can be "uncorrected" as much as 2 seconds in a 24-hour period. Bear in mind, however, that crystal-controlled circuits are temperature-sensitive, and will probably need trimmer adjustment initially to put them "on the money." Claimed accuracy is typically 0.01%, or about 9 seconds per day.
[ This article appeared in the September 1976 issues of Radio-Electronics magazine. ]
DIGITAL CLOCK KIT ROUNDUP
Part II. A comparison between the various digital clock kits that are currently available
Fred Blechman
The first part of this article discussed the features and presented a comparison chart of the clocks that are presently available. This second part of the article will take an in-depth look at each of the clock kits in alphabetical order.
|
| |
|
| |
|
| |
|
| |
|
|
Altaj Electronics
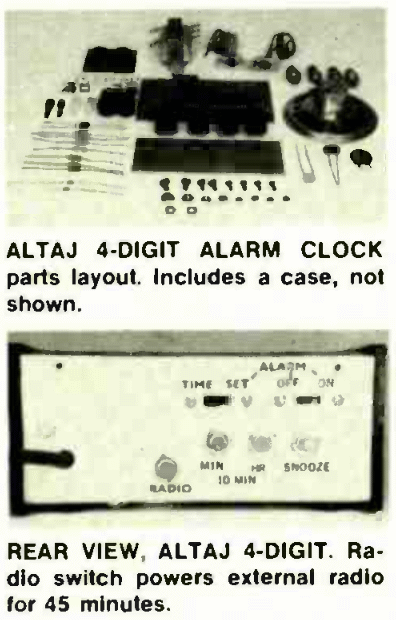
Both of the Altaj clock kits
specify the use of "Molex pins", which they don't include. Molex pins
substitute for IC sockets. They are spring-pins that are made in strips
with the standard IC pin spacing of 0.1 inch. They are joined together
at the top by a common flat metal section. You merely snip a length
of strip that has the number of pins you want. with the connecting top
section intact. insert them into the circuit board, and solder them to the
foil. Now that the pins are secured by the solder joint, you bend the top
connecting section hack and forth with pliers until it breaks off, leaving
the individual spring contacts all in a row, ready to accept the pins
of the IC. Molex pins are somewhat hard to find, but suppliers heavy in
the IC area have them. (James Electronics has them for $1 per strip
of 100). Since clock IC's are subject to destruction in soldering and
handling, Molex pins or IC sockets are used in most of the kits. Also, if
you have a bad IC and want to unsolder it from the circuit board, you've
got a real problem - some of the IC's have 40 pins to unsolder all at
once!
The direct-drive 4-Digit Alarm Clock offers a sleep switch to shut off an external radio after 45 minutes. The digits for this clock can he ordered in either 0.25 or 0.5-inch heights. The King is the most versatile of all the kits with respect to options. You can order 0.3-inch high red, yellow or green digits, or red digits 0.5 inch or 0.6 inch high. Extra modules are being offered to read temperature in four digits, to start an external appliance at a specified time, and to chime on the hour electronically! This clock is difficult to handle during final assembly, since the spacing and positioning of the display within the case involves connecting the control hoard and display board with 2-watt resistors that feed the display segments and double as structural members. The cases for both of these clocks are "first class"!
Babylon Electronics
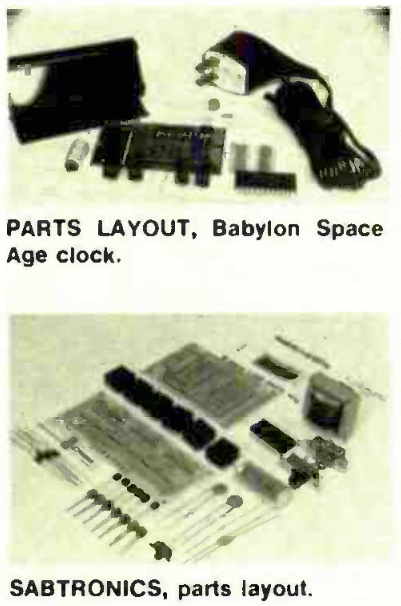
The Spate Age Clock Kit is the smallest and certainly the "cutest" of all
the clocks reported in this article. It also got the most attention at a
display of eight of these clocks at a recent Clock Society meeting. It
somehow manages to use fewer parts than any other MM5314 clock, yet
works beautifully. The kit is very complete, even including Molex pins
and wire for the three "jumpers". Only solder was omitted.
To conserve case space, the transformer is a wall-plug type, and the switches for setting time are constructed and pre-assembled right on the printed circuit board. You simply apply pressure with a pencil point through the three holes in the back of the case for fast, slow and hold! The coded pulsing colon described earlier allows precise time setting to the second. even though only four digits are displayed. Soldering is somewhat difficult, since many of the circuit paths on the PC board are very close together, and the pin spacing of the FND-70 displays are close. But, with care and a jeweler's loupe to inspect your work, you'll end up with a clock sure to get attention.
Bill Godbout Electronics
This is the only kit reported on that includes sockets for
all the displays and the IC. You can make this clock with remote readouts,
digit-blanking (display off to conserve power during battery use), 12 or
24-hour display, and battery or 50- or 60-Hz operation. Actually, any
of the MM5314 clocks can do all these things, but the PC board and the
instructions in this kit provide the method in detail. The PC board is
designed so you can literally saw off the display portion and put it on
your dashboard, for example, connected by a 13-wire ribbon cable to the
clock control board under the dash. Specific instructions and sketches are
provided to do this. Using a timebase described earlier, you can have a
"Cheap Car Clock" (Godbout offers combination clock and timebase kit
for $23.50).
Caringella
Beautifully packaged, and with clear, detailed
instructions, these clocks would be rated "easy" in assembly, except
for the large number of parts. No shortcuts have been taken, and these
are top-quality clocks in appearance and performance. Great pains have
obviously been taken to see that the builder has a no-hassle assembly
job. Every wire needed in the assembly is color-coded by length, with
the ends stripped of insulation and tinned for easy handling and
soldering. If several wires follow a common path, they are furnished
in pre-assembled tied cables, with each wire color-coded! This kit
was really a delight to assemble, especially after some of the
head-scratching required with other kits that offered not much more than a box
of parts and a poorly reproduced schematic. Caringella kits show great
attention to detail, in both the design of the kit and the clarity of
instructions. The printed circuit boards were silk-screened on the
component side to show the location of every part, making assembly
almost foolproof.
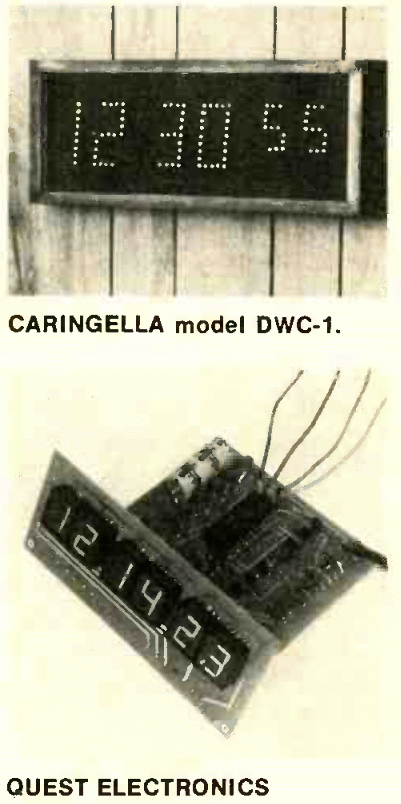
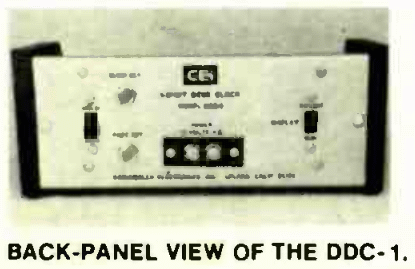
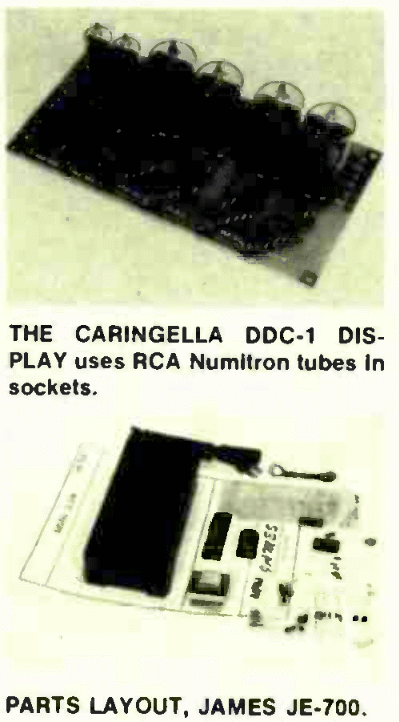
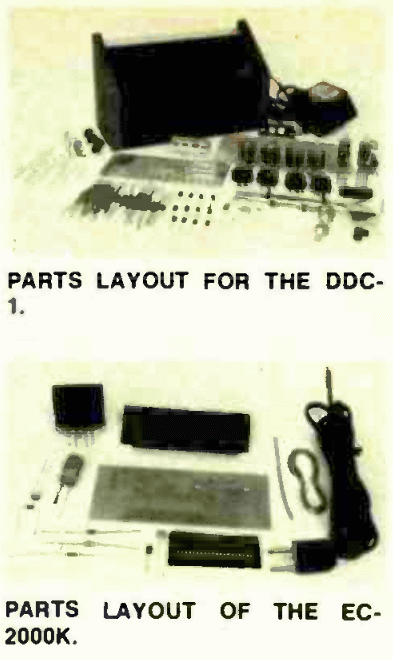
Several Caringella clocks deserve special mention for unique design. The DDC-1 uses large digits for the hours and minutes, smaller ones for the seconds, making the display easier to interpret. This is also true with the DWC-1 and the MDC-1. The DWC-1 is a huge wall clock, with digits formed from individual LED's placed in lines to create digit segments. Furthermore, this clock and the MDC-1 have crystal-controlled built-in battery-powered timebases: this allows them to be unplugged, carried to another location, and when plugged in again with the displayed time being "right on". This also provides power failure immunity. The LDC-1, and smaller SDC-1, use only a single digit to read hours and minutes. The digit first reads tens-of-hours, then units-of-hours, then tens-of-minutes, then units-of-minutes - and then pauses before repeating! The LDC-1, in its 7-inch high hexagon wood case and single 3 1/2 inch high digit, is a rare decorator conversation piece!
Fig. 2 shows the DDC-1 schematic - an MM5314 IC design with NO shortcuts!
Digital concepts
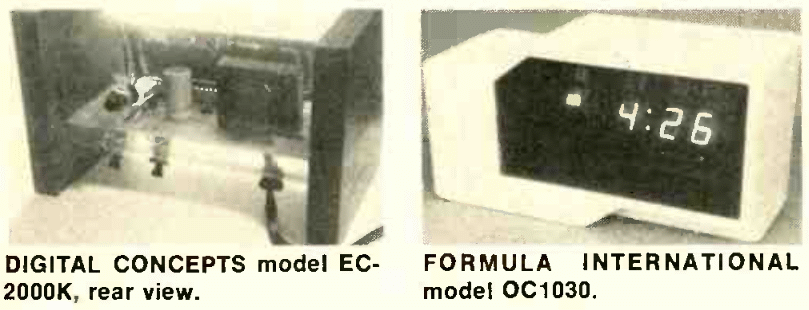
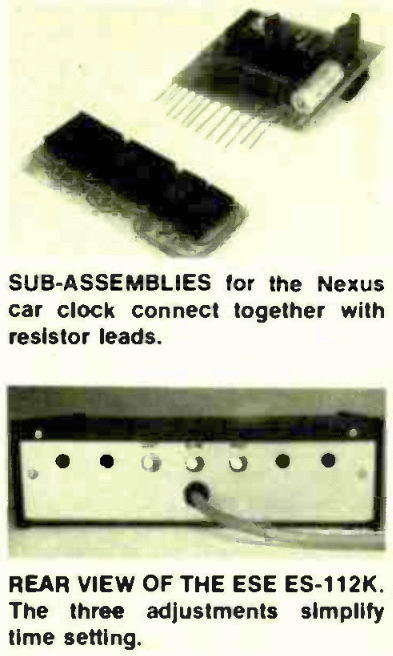
The EC -2000K takes less
than a half hour to build, since there are very few parts. The display
is a single large planar fluorescent display module that contains four
large digits, colon, and AM and PM letters. Standard coloring is bright
blue, but you can order other colors - they simply paint the front of
the module the color you request, since the fluorescent output covers a
broad spectrum of colors. All parts, including the transformer, mount
directly on one printed circuit board. The only external wiring is
the line cord and the wires to the time-setting switches. One switch
selects unit-minutes and seconds display, instead of hours and minutes,
and by proper operation of the switches this clock can be used as a
24-hour stop-clock that counts by the second! The case is unique in its
clear tubular shape, with end-blocks in decorator wood. The end blocks
have annular grooves that fit over the ends of the cylinder - no unsightly
screws.
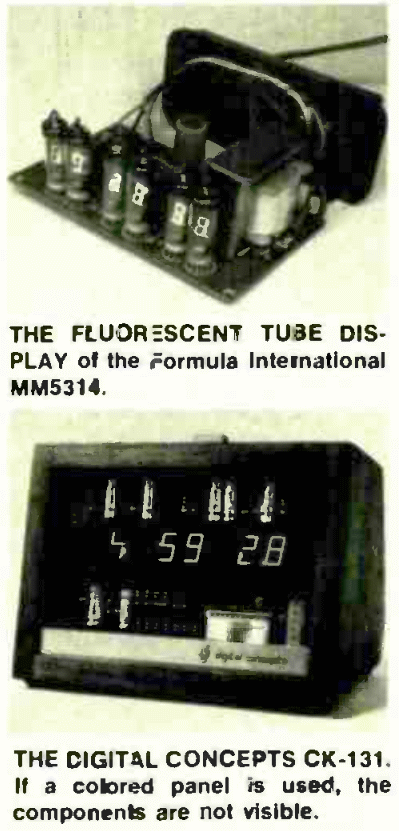
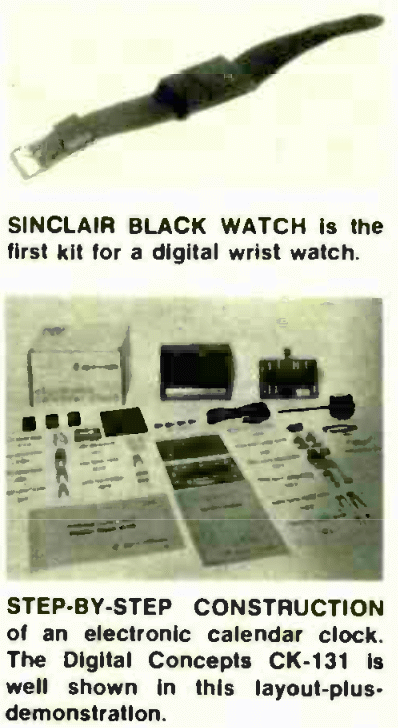
The CK-131 is a calendar clock - that is, it will read month and day alternately with time, if desired. With a clear Lucite front panel the display is orange and the circuit board parts show. With a colored panel, the display appears red, and the parts are not visible.
ESE
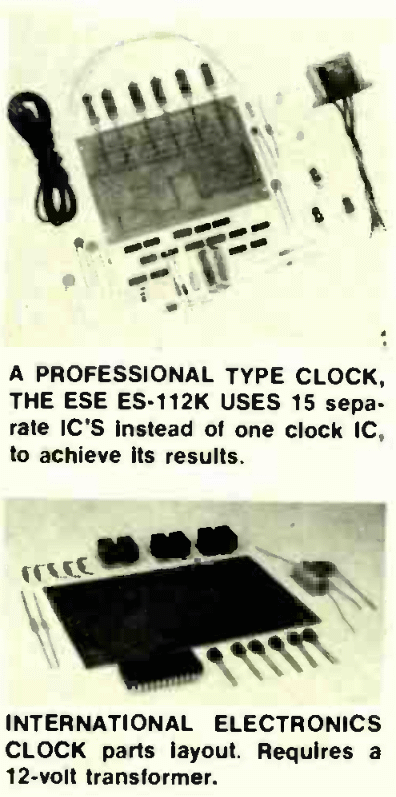
Instead of using a clock IC, this kit uses 15 individual IC's to perform the
various functions of wave-shaping, dividing, decoding, encoding and
driving the displays. This is a professional piece of equipment used
extensively in the broadcasting industry, and is not really aimed at the
hobby market. Assembly is straightforward, with very few parts beside
the IC's. It comes in an attractive, rugged case and uses large, bright
readouts with simple time-setting switches.
|
| |
|
| |
|
| |
|
| |
|
| |
|
| |
|
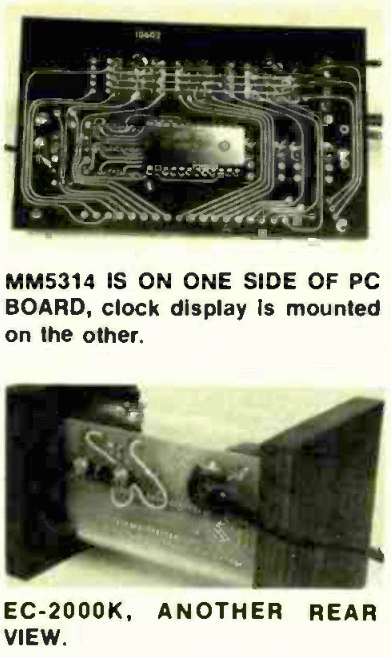
Formula International
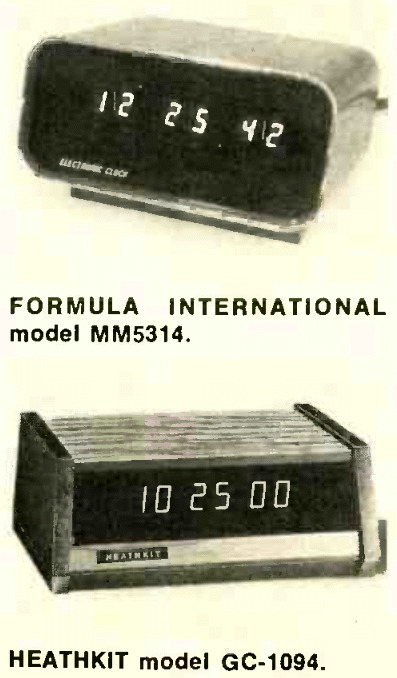
The MM5314 clock is actually a simple
kit to build, but the instructions are poorly planned and poorly
reproduced, making a simple job confusing. With better instructions, this
would he a very good "first clock kit" since the kit is very complete
(only lacking solder and switch wiring). The circuit board is
silk-screened to show component location and the only "tricky" part of the
assembly is putting the eleven wire leads on each of the six fluorescent
tube displays into the PC board. The case is modern and attractive, and
the display a pleasant blue-green. The OC130 and 0C1032 are also very
attractive when complete, but assembly of these two kits had best not be
your first entry into the field. The 0C1032 in particular is difficult
to assemble, with the display sandwiched between two large circuit boards
connected together with "strong copper wires". Although the OC1032
has only four digits, they are 1 inch high, and can he switched to read
minutes and seconds. The digits are a bright yellow-orange, and the case
is outstanding in appearance.
Heath
In the forefront of new design, these
kits were produced before many of the other clocks shown, yet contain
almost every imaginable feature - except simplicity! The designs are
complex, with a maze of parts and cabling making them the most
time-consuming clocks to build of all those in this article. The superb
manuals would allow even a beginner to build one of these clocks given
the time - a lot of time. However, if something goes wrong, it would take
a competent technician to unravel it!
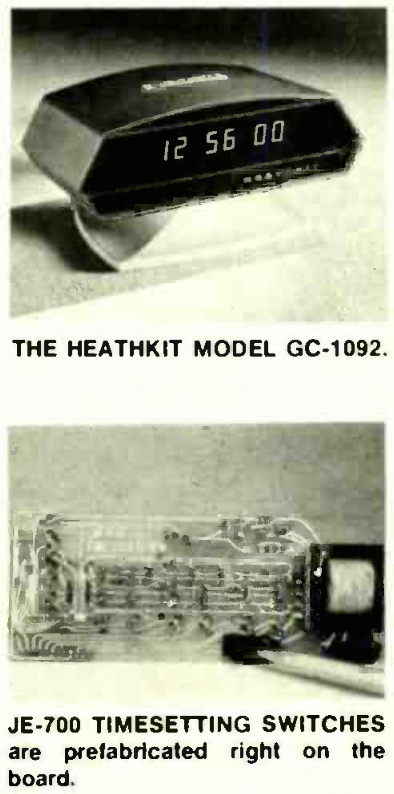
The GC1092A and GC1092D look alike - they use a similar case - but the "A" is an alarm version, and the "D" is a calendar clock. For power-failure operation, both use a battery-powered timebase oscillator whose output is calibrated by zero-beating against the line frequency as a time standard. The GC1093 is the only clock designed for car use, and uses a crystal-controlled timebase for accuracy. It also features switch-selection of elapsed time, repeating every 20 minutes. This would he a handy feature for sports car rallies.
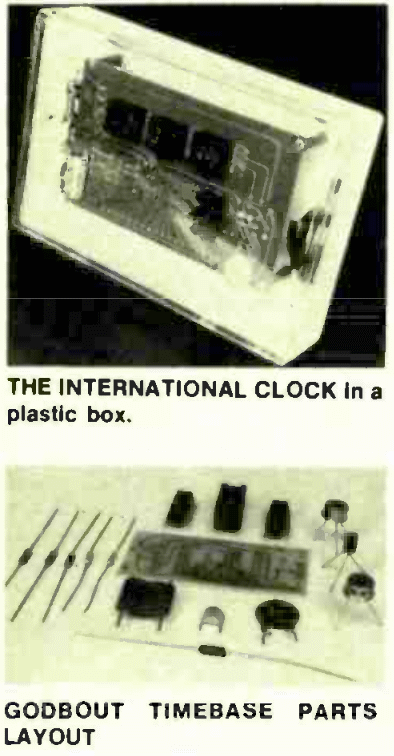
International Electronics
The two-sided printed circuit board,
with plated-through holes, makes assembly of this kit a breeze. This is
a "bare-bones" kit, containig all the necessary electronic parts, but
without transformer, wire, switches, solder, case or sockets, so you'll
have to do some additional shopping or junk-box raiding to end up with a
usable clock. The PC board is designed with solder pads to connect wiring
for remote readouts, and the instructions designate the outputs. For some
unexplained reason, the PC board and remote connections will accommodate
9 digits, although only six are used. This is the least expensive kit
on our list, even though it offers six digits at a lower price than some
four-digit kits. With a two-buck transformer you probably have around
(regular 12-volt type), three simple SPST or pushbutton switches and a
plastic case, you're in business!
James Electronics
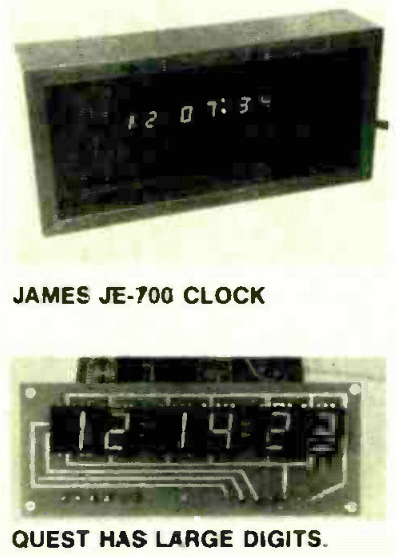
Appearing at first to
be a very simple kit and containing everything you need but solder - even
a neat wooden case and red plexiglass front panel - the JE-700 turns out
to be a tedious assembly job because of 29 jumpers (wire connections)
on the component side of the PC board. Assembly is not difficult - just
slow. Time is set by pushing a pencil through holes in the back of
the case to press on PC board switches (similar to Babylon). However,
the HOLD switch is not provided to synchronize the seconds! This can
be easily added by providing a switch to ground from pin 13 of the
IC - but no mention of this appears in the instructions. Speaking of the
instructions, they look nice enough but contain a number of errors sure
to confuse a beginner.
The Wall Clock uses 0.6 inch high readouts for hours and minutes and 0.3 inch high readouts for seconds. Only three jumpers are used, so assembly is straightforward, if you can follow the instructions.
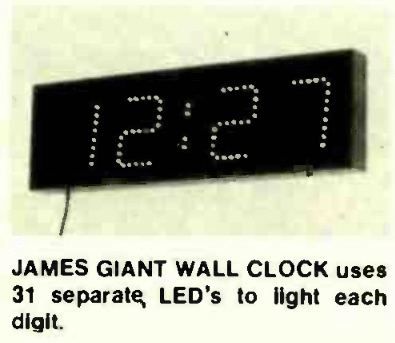
The most recent additions to the James clock-kits are the giant-digit wall clocks. Thirty-one separate LED's are used to form the seven segments of each digit, with additional LED's used to form colons between pairs of digits. Construction is not difficult, but takes time because of the large number of LED's used and because four jumpers are used with most of the digits. The 4 and 6-digit versons of this kit are identical for the first four digits with an add-on board containing the fifth and sixth digits. The assembly instructions are sparse. but a good pictorial makes them adequate. Time setting is simple using switches built -on to the PC board, just like the JE-700 - except that a HOLD switch is included to stop the seconds count. The finished unit, complete in wooden case, is a sight to see!
Mestlna
The SP-169 clock kit is unusual in several respects: The PC
board is 4 X 6 inches, rather large, but so designed that it is in four
separate sections that can be cut apart. The case is a surplus extension
TV speaker cabinet that includes a speaker and volume control, and a
provision is made for either AC or battery operation. The four sections
of the PC board, when cut apart, are the same size and are designed to
allow stacking, like a club sandwich. All the necessary parts (except
line cord) are provided for AC operation, but detailed instructions,
PC board section and a parts list provide the timebase option with any
crystal up to 6 MHz that can be divided down to 50 or 60 Hz evenly. The
instructions are not elaborate, but include a good pictorial parts
layout and schematic. Since the case was not made especially for this
kit, final assembly required some cutting and drilling of holes.
The SP-284 Cheapy Clock is one of the easiest of all the kits to build, and the only kit reported on to use the National Semiconductor MM5316 Alarm Clock IC. This is a direct-drive IC, and no transistors or resistors are used to operate the display. The IC has the capability for alarm, snooze and "sleep switch" and the instructions show how they can be added to the basic kit. This is also true of the AM/PM indicators. The display consists of four bright blue-green fluorescent glass tubes with high visibility even in bright surroundings. One of the three switches supplied with the kit "shifts" the display to read unit-minutes and seconds for precise time-setting. With slide switches used in place of the pushbutton switches provided, this could be used as a 24-hour stopclock that counts by the second. Although no case is provided, the kit easily mounts in a flat plastic case with the switches and the four fluorescent tubes projecting through the top lid!
Nexus
These kits were
designed specifically for automotive use, and are the same design except
for case and display size. They contain a crystal-controlled timebase
for operation from 12 volts. The displays are bright and clear due
to high current flowing through the LED's. The IC heats up, but is
operated within limits. Time-setting is ingenious - a straight pin is
inserted through a sandwich made up of the PC board, non-conducting
sponge, and conducting foam pads to act as a switch. Although only
fast and slow settings are provided, you can set these clocks almost
to the second without the need of a third switch. Since the accuracy is
inherently less than perfect (within 9 seconds per day in constant ambient
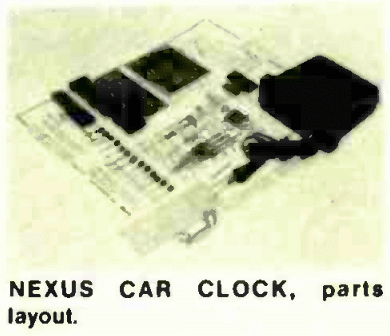
temperature), second-setting is not necessary. The parts layout, case
design and interboard wiring between control board and display board
show good planning and execution. The Car Clock is the smallest 6-digit
clock on our listing, and is easily located and installed in a car. The
Van Clock is intended to he mounted in the wall of the living-quarters
of the vehicle.
Quest
Step-by-step instructions, a complete schematic
and a detailed pictorial view make this a simple clock to build. If not
for the connections between the control and display board, construction
would be listed as "Easy". The digits are large and bright, and the
transformer is mounted in a wall-plug/line cord furnished as part of
the kit. Switches are not included, to allow the user the flexibility of
using his own type. Display blanking is described in the instructions if
you should want to remote the display board. The PC boards in this kit
are two-sided, with circuit wires spaced for easy soldering.
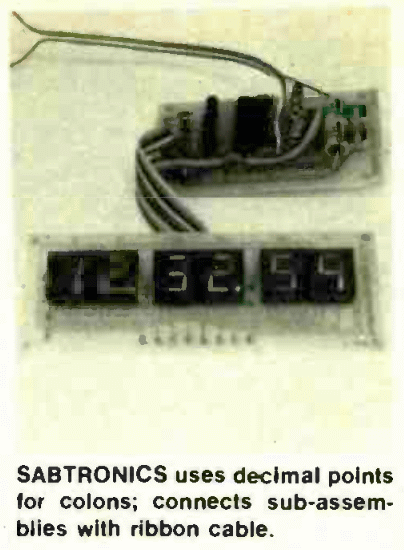
Sabtronics
Although very similar in appearance and circuitry to the Quest
Digital Clock Kit, there are some definite differences. This clock
kit includes three switches (two momentary, one on-off) and a separate
transformer, but no line cord. The display can be wired to show a decimal
point between pairs of digits, to simulate a colon, by adding only one
resistor. The asembly is simple, but connections between control and
display boards move it into the "Medium" assembly rating. The display
is not very bright, since the 270-ohm segment resistors limit the
LED current. Changing these to 100-ohm resistors yields a very bright
display and does not overdrive the IC. A smaller display, using
0.25-inch high digits, is available for $5 less than the price shown for
the 0.5-inch digits. Since the display board is completely separate
from the control board, connected by 14 wires (13 for digits, 1 for
decimal points), you can easily remote this board by using "ribbon cable".
This cable, available from James Electronics. (26-gage, 20-conductor - 59c
per foot) is a flat ribbon of parallel adjacent wires, each in
a different colored insulation: you simply fan out the ends to form
individual wires, each a different color.
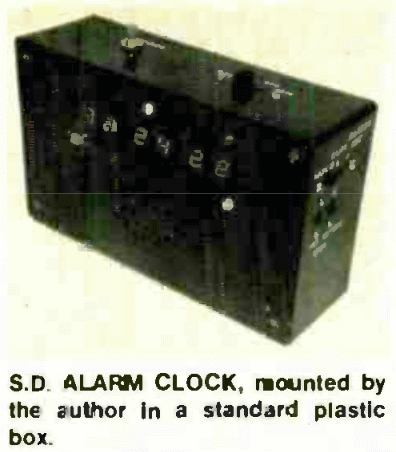
S.D. Sales
Patience and a good supply of stranded wire are needed to build this two-part
clock kit. However, the result is a really nicely-operating 6-digit
alarm clock, at the lowest price on our list. The display PC board is
entirely separate from the control board, so it's a natural for a remote
display. Fourteen wires join the display board to the control board - six
for digit control, seven for segment control, and one to control the LED
used as a PM indicator. Colons are not furnished, but the instructions
cover their installation as an option. Four slide switches are used
for setting time and alarm functions, with a pushbutton switch used for
snooze. The Hewlett-Packard LED displays are bright and sharp. With the
S.D. Timebase that sells for $5.95, this would make a good electronic
alarm clock for a camper or trailer.
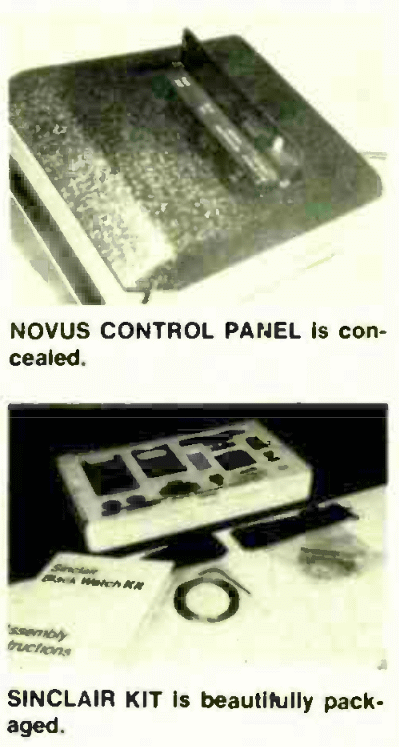
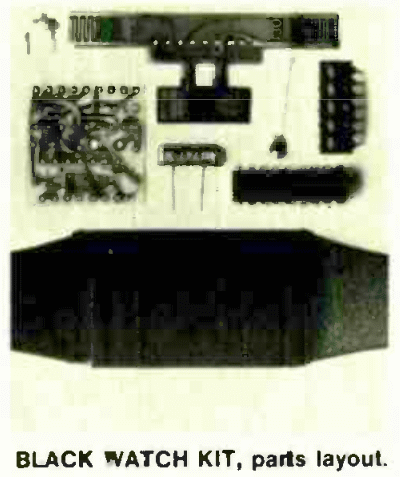
Sinclair
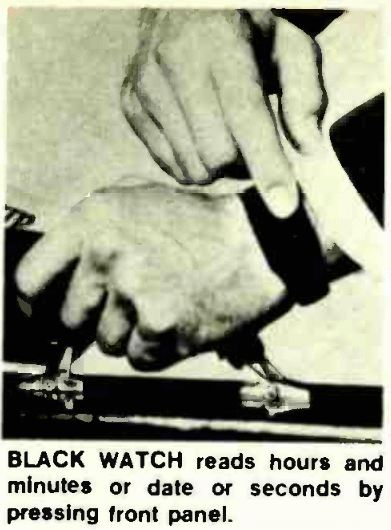
Although not a clock, but
a four-function wristwatch, the Black Watch is an electronic timepiece
in kit form, so it's included in this survey. Everything - even very fine
diameter solder - is included, and the PC board has the very small IC
already assembled to it. The actual assembly time is short, but varnish
is used at two steps in the assembly procedure to protect the circuit
from environmental attack - and it takes four hours for the varnish to
dry! Also, calibration can take weeks if you're a fanatic, since it's a
hit-and-miss proposition of comparing watch time to real time over a
period of days and adjusting the crystal-oscillator trimmer to compensate
for a fast or slow condition. There is very little soldering, and no
watchmaker's tools are needed (though the jeweler's loupe is very handy
to check those solder joints!). The result is a unique experience and a
great conversation piece - after all, how many people do you know who've
built their own electronic wristwatch?